Creating a Stylish and Functional Space: A Guide to Building a Wall-Mounted Floating Makeup Vanity
Related Articles: Creating a Stylish and Functional Space: A Guide to Building a Wall-Mounted Floating Makeup Vanity
Introduction
In this auspicious occasion, we are delighted to delve into the intriguing topic related to Creating a Stylish and Functional Space: A Guide to Building a Wall-Mounted Floating Makeup Vanity. Let’s weave interesting information and offer fresh perspectives to the readers.
Table of Content
Creating a Stylish and Functional Space: A Guide to Building a Wall-Mounted Floating Makeup Vanity

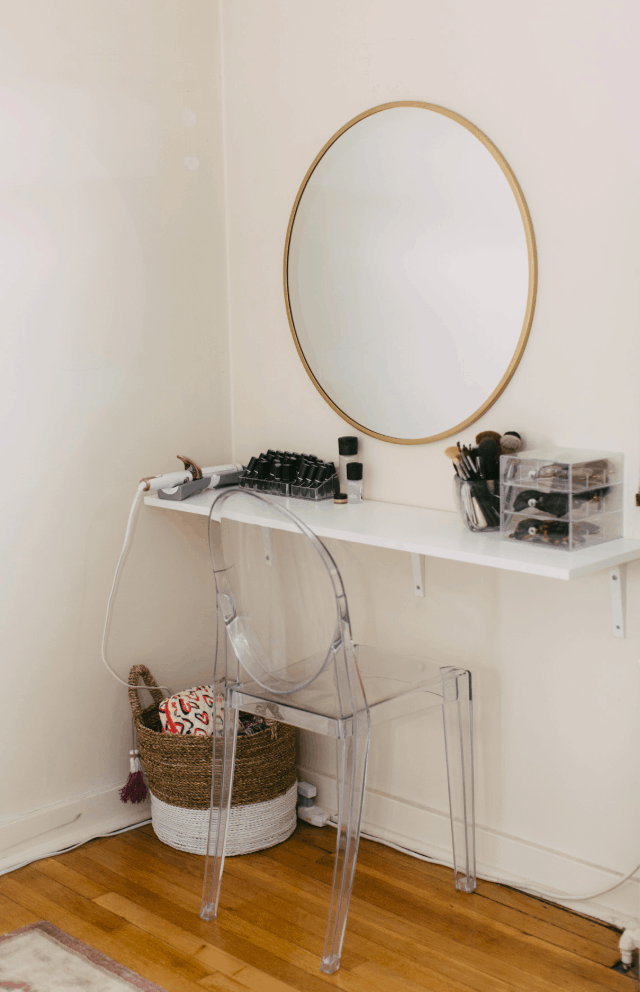
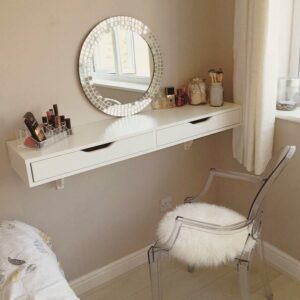
In the realm of interior design, maximizing space and creating a visually appealing environment are paramount. A wall-mounted floating makeup vanity emerges as a solution that addresses both these concerns, offering a sleek, modern aesthetic while optimizing floor space. This article will guide you through the process of constructing a wall-mounted floating makeup vanity, providing a detailed understanding of the steps involved, the necessary materials, and the advantages of incorporating this design element into your home.
Understanding the Advantages of a Wall-Mounted Floating Makeup Vanity
A wall-mounted floating makeup vanity offers numerous benefits that contribute to a more functional and aesthetically pleasing space:
- Space Optimization: By eliminating the need for bulky legs or a base, a floating vanity maximizes floor space, creating a sense of openness and minimizing clutter. This is particularly advantageous in smaller bathrooms or bedrooms where space is limited.
- Enhanced Aesthetics: The sleek, minimalist design of a floating vanity adds a modern touch to any room. The absence of visible supports creates a clean and uncluttered look, enhancing the overall visual appeal.
- Ease of Cleaning: The absence of a base beneath the vanity simplifies cleaning, allowing for easy access to dust and dirt beneath the countertop. This design feature promotes a hygienic environment.
- Versatility: A wall-mounted floating vanity can be customized to suit various needs and preferences. The countertop can be chosen from a variety of materials, such as marble, granite, or laminate, while the vanity can be incorporated into different room styles.
Essential Materials and Tools for Construction
Before embarking on the construction process, gather the necessary materials and tools:
- Wood: Select a sturdy and moisture-resistant wood such as plywood or MDF for the vanity base.
- Countertop: Choose a material that suits your style and budget, such as marble, granite, laminate, or even a solid wood slab.
- Brackets: Strong and durable brackets are crucial for securely attaching the vanity to the wall.
- Hardware: Screws, nuts, bolts, and other hardware are required for assembling the vanity and attaching it to the wall.
- Finish: Select a finish that complements your desired aesthetic, such as paint, stain, or varnish.
- Tools: Basic woodworking tools, such as a saw, drill, sander, and measuring tape, are essential for construction.
Step-by-Step Construction Guide
Follow these detailed steps to build your wall-mounted floating makeup vanity:
1. Design and Planning
- Measure the Space: Carefully measure the space where the vanity will be installed to determine the optimal dimensions for your vanity.
- Create a Blueprint: Sketch a detailed blueprint of the vanity, including the dimensions, the location of the brackets, and the desired countertop size.
- Choose Materials: Select the desired wood, countertop material, and finish based on your budget and aesthetic preferences.
2. Constructing the Vanity Base
- Cut the Wood: Using a saw, cut the wood to the dimensions specified in your blueprint. Ensure that the cuts are precise and clean.
- Assemble the Base: Join the wood pieces together using wood glue and screws. Use clamps to secure the pieces during assembly.
- Sand and Finish: Sand the assembled base to create a smooth surface. Apply the desired finish, such as paint, stain, or varnish, to achieve the desired aesthetic.
3. Attaching the Brackets
- Determine Bracket Location: Mark the wall where the brackets will be attached, ensuring that they are securely anchored to studs.
- Install Brackets: Attach the brackets to the wall using appropriate screws and anchors. Ensure that the brackets are level and securely fixed.
4. Installing the Countertop
- Measure and Cut: Carefully measure and cut the countertop to fit the vanity base. Ensure that the edges are smooth and polished.
- Attach the Countertop: Secure the countertop to the vanity base using appropriate adhesives or hardware. Ensure that the countertop is securely attached and level.
5. Final Touches
- Install Sink and Faucet: If incorporating a sink, install it securely on the countertop. Attach the faucet to the sink and ensure that it functions properly.
- Add Storage: Install shelves, drawers, or other storage solutions to organize makeup and other items.
- Clean and Decorate: Clean the vanity thoroughly and add decorative elements, such as mirrors, lighting, and plants, to complete the design.
FAQs about Wall-Mounted Floating Makeup Vanity DIY
Q: What type of wood is best for a floating vanity?
A: Moisture-resistant woods like plywood or MDF are ideal due to their durability and resistance to warping.
Q: How do I ensure the vanity is securely attached to the wall?
A: Use strong and durable brackets, anchor them securely to studs, and use appropriate screws and hardware.
Q: What are some countertop options for a floating vanity?
A: Marble, granite, laminate, solid wood, and engineered stone are popular countertop options.
Q: Can I add storage to a floating vanity?
A: Yes, you can incorporate shelves, drawers, or cabinets to create storage space.
Q: How do I maintain a floating vanity?
A: Regular cleaning with mild soap and water and periodic sealing of the countertop will help maintain the vanity.
Tips for Building a Wall-Mounted Floating Makeup Vanity
- Plan Carefully: Create a detailed blueprint and measure the space accurately before beginning construction.
- Use Quality Materials: Invest in sturdy and durable wood, brackets, and hardware for a long-lasting vanity.
- Ensure Secure Installation: Anchor the brackets securely to studs and use appropriate screws and hardware.
- Add Personal Touches: Customize the vanity with decorative elements, storage solutions, and a countertop that reflects your style.
- Maintain Regularly: Clean and seal the vanity periodically to prevent damage and maintain its appearance.
Conclusion
A wall-mounted floating makeup vanity offers a stylish and functional solution for optimizing space and creating a visually appealing environment. By following the step-by-step guide outlined in this article, you can build a custom vanity that complements your home decor and meets your specific needs. With careful planning, quality materials, and attention to detail, you can create a stunning and practical addition to your bathroom or bedroom. Remember, the process of building a floating vanity is a rewarding one, allowing you to personalize your space and create a unique and functional design element.


Closure
Thus, we hope this article has provided valuable insights into Creating a Stylish and Functional Space: A Guide to Building a Wall-Mounted Floating Makeup Vanity. We hope you find this article informative and beneficial. See you in our next article!